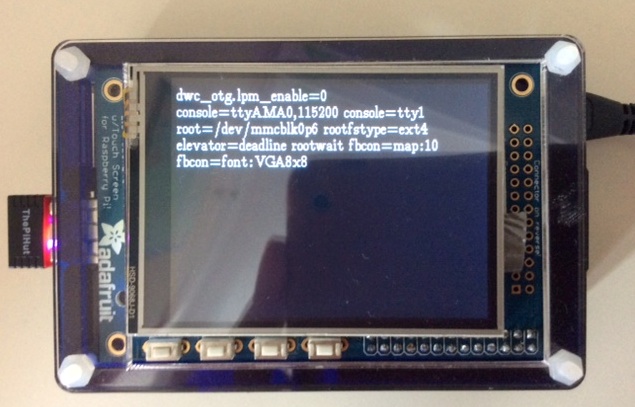
Adafruit PiTFT in headless mode

I recently purchased the Adafruit PiTFT screen to give one of my otherwise headless Raspberry Pis an onboard display. This 2.8″ touch screen is fairly low-spec with 320×240 pixels, but when you think about the Orb as one-pixel browser, then that’s plenty of real estate for status messages. In fact one of my reasons for this purchase was the tutorial on the Adafruit Learning System that describes step-by-step how to set up the PiTFT screen as default tty1 output, which allows one to follow much of the boot process when the Raspberry Pi starts into the Raspian OS, including the display of its IP address. Adafruit go a little further and also show you how to configure the X windows environment (the system that displays the graphical desktop) to leverage both display and touch control capabilities of the PiTFT.
I run a couple of web services and my overall aim was to use Node-RED for status checks and occassional messages on the PiTFT. As Node-RED runs on all of my Raspberry Pis by default, my plan was simple: Redirect the console log (available through the debug node) to framebuffer /dev/fb1, as the PiTFT is represented through the Adafruit kernel hack.
Unfortunately, my knowledge of hardware drivers and abstraction layers under Linux is rather limited. As far as I could piece together from documentation on kernel.org, a framebuffer is nothing but a file representation (e.g. in the device directory as /dev/fb1) of a 240 (lines) x 360 (columns) x 24 bit (8 bit RGB) memory. In fact, doing a sudo cat /dev/urandom > /dev/fb1 fills the PiTFT screen with random pixels before failing because the device fb1 “is full”. There are quite a few programs that can write directly to a framebuffer, most notably framebuffer image viewer fbi that just requires the -d /dev/fb1 option to display bitmap files on the PiTFT. Other programs or services need to do a little bit more work in the background, for example can fbcon emulate a text console and dynamically represent it as bitmap in the framebuffer. The Adafruit tutorial shows how through adding fbcon=map:10 to /boot/cmdline.txt the standard boot console tty1 can be displayed on the PiTFT.
For custom messages on the PiTFT thus I could see a few different options: For console output,
- connect a USB keyboard to the Raspberry Pi and work directly on tty1; (no, really not!)
- somehow convince fbcon or the fb boot console to work with a different tty (or /dev/pts/xyz) — and I wasted a week’s worth of evenings unsuccessfully trying this; if Notro reads this and knows how to help, please get in touch! A post to Adafruit’s forum also was of limited utility.
or by ‘graphical means’ either write Node-RED statuses into
- a bitmap file for display with fbi or
- a HTML file for display in a window-less Chromium session under X. The latter is especially appealing in the light of recent developments in which people marry Node-RED goodness with nice graphical output, see e.g. Lawrence Griffith’s tweet.
Ultimately, I discovered fbtext, a no-thrills framebuffer text viewer. To get going on the Raspberry Pi, I had to unpack the latest .tar.gz file from SourceForge, rename Makefile.fbcon into Makefile, run make, and there it was: fbtext in all its glory. The picture above shows the result of issuing sudo ./fbtext -d /dev/fb1 /boot/cmdline.txt, and there seem to be a few options to control wrapping behaviour and font settings — things I still need to explore further.
I’ve also already tried the utility of fbtext from Node-RED and I’m happy to report that the flow below with the exec node does very much what one would expect.
